The pavers are only part of the cost: excavation, base preparation, and drainage can shape the project just as much. For permeable pavers installation in Parrish, the price depends on the area, existing surface, soil, and work needed below grade, and is provided after a quote request.
A permeable surface can give a driveway, patio, or walkway a refined finish while letting rainwater filter through its joints. A lasting result depends on matching the base and drainage plan to the site, not simply choosing pavers that look right.
This guide covers the main project considerations, how the base is prepared, and what to know about installing and maintaining permeable pavers in Parrish, Florida. Grading, aggregate, and careful finishing work together to support a well-designed surface through Florida’s rain.
Key Takeaways
- Compare project estimates by looking beyond the pavers themselves: excavation, aggregate, edge restraints, and finishing work all affect the total.
- Plan the base around the surface’s use and site conditions, then compact the aggregate in controlled lifts to support drainage and reduce settling.
- Choose open-graded aggregate and suitable filter fabric to help water move through the layers while limiting soil migration.
- Protect long-term performance by keeping joints clear of trapped debris and addressing shifting or drainage issues as they appear.
- For a cohesive outdoor plan, Landscape By Design Of Palmetto can bring hardscapes, grading considerations, irrigation, and lighting into a considered landscape design.
Table of Contents
What do permeable pavers cost?
For a permeable paver project, price depends on the surface area, existing pavement, excavation, base depth, drainage, and finishing details. A project price is provided after a quote request, with those site and material needs shaping the scope.
Permit and stormwater approval requirements depend on the project scope and rules applicable to the property. A permeable surface alone doesn’t determine whether local approval is required.
Rebates depend on an active program and its eligibility criteria, while regulations depend on the property and planned work. Don’t assume a rebate applies or that permeable paving removes other project requirements.
- Define the surface and project scope. Measure the planned driveway, patio, or walkway, then note whether the site is bare ground or has existing concrete or asphalt. Existing material can add demolition and removal work, while a larger or deeper installation requires more aggregate. These differences influence project costs before pavers are selected.
- Include the setting bed in your material plan. The recommended permeable-paver setting bed is 2 inches of 3/8-inch crushed stone. This layer supports even placement while leaving pathways for water to move into the permeable base. Keep its specified depth in the estimate instead of treating it as ordinary compacted gravel.
- Choose joint aggregate for open drainage. Use ¼-inch chip stone to fill permeable-paver joints and openings. Its smaller, angular form helps the aggregate stay in place while preserving voids for water. The guide estimates approximately 12-15 pounds of coarse stone sand per square foot for bedding, drainage openings, and joints, so area affects material quantities.
- Sequence installation in distinct phases. Prepare and compact the base, place and level the setting bed, then lay the pavers in the planned pattern. Add joint aggregate after the pavers are set, filling the openings without covering the surface unnecessarily. Each phase relies on the one before it, so skipping preparation can undermine the finished work.
- Fill joints and drainage openings carefully. Sweep chip stone across the pavers so the joints fill evenly, including narrow edges and transitions. Check for low spots or open gaps, then replenish aggregate where needed. This step supports the appearance of the surface and keeps the openings available for rainwater to pass through.
- Complete edge and surface finishing. Permeable systems need edge restraints to hold the pattern at its borders. Finishing also includes joint sand and sealing for protection and durability. Select finishing materials and methods that suit the permeable assembly, so protection doesn’t compromise the intended drainage route.
- Account for final compaction and cleanup. Follow the installation sequence when compacting and topping up joints; aggregate can settle into openings during this stage. Sweep remaining material from the paver surface and inspect the edges. A clear finish makes gaps easier to spot and correct before the walkway or driveway enters regular use.
Base grading, compaction, and drainage
A stable permeable surface starts below the pavers, where grading, soil, and aggregate work together. Prepare the ground in sequence so water can enter the base without leaving stagnant areas.
Lay Geotextile Fabric
Place woven geotextile fabric over the prepared ground before adding aggregate. Overlap seams by at least 6 inches to reduce gaps where soil could migrate into the stone. Keep the fabric smooth and continuous, and avoid tearing it with tools or equipment. The fabric separates soil from the base while allowing water to pass through.
Grade and Drain the Base
Shape the ground so water moves through the permeable layers rather than collecting on the surface. Assess the soil first: soil that captures water can leave it stagnant beneath the pavers. Match the aggregate base depth to the planned use, with 6 to 8 inches recommended for patios and walkways, and 8 to 12 inches for driveways.
Allow at least 30% more gravel base than for non-permeable pavers in pedestrian or vehicle areas. This added storage capacity gives rainwater room to move through the system. Avoid directing runoff toward buildings or neighboring areas; the site’s slope and soil determine how water should travel.
Compact the Base in Lifts
Add graded stone in layers no thicker than 3 inches, then compact each layer before adding the next. The tutorial recommends compacting permeable-paver gravel in 2-inch lifts. This gradual method helps create a firm, even foundation throughout the base, rather than a compacted crust over loose stone.
Check each layer for uneven areas before continuing. If the surface dips or shifts during compaction, correct it before adding more aggregate. Consistent layers support the pavers and help limit settling that can disrupt joints and drainage.
Match Drainage to the Surface
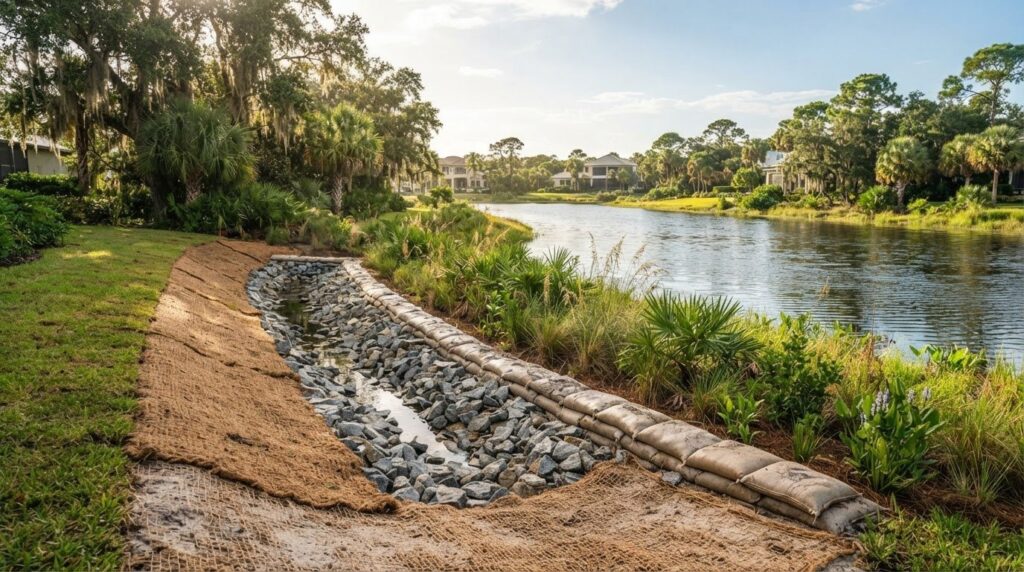
Unlike conventional concrete or asphalt, permeable pavers let rain pass through their joints into the stone layers below. This can reduce surface runoff, but only when the soil and base can receive the water. Grade and compact the prepared layers carefully, then check how the finished layout meets the surrounding ground and drainage paths.
For a patio beside a walkway, consider how each area connects so water doesn’t collect at the transition. A thoughtful site layout and drainage plan brings the slope, paver edges, and planting areas into one coordinated surface.
Paver durability and maintenance
Inspect the surface regularly and after heavy rain. Remove debris when it starts filling the joints or openings. Common problems include clogged joints, trapped water, shifting pavers, weed growth, and ant activity, often linked to blocked openings or disturbed joint material.
- Clear debris before it blocks drainage. Remove leaves, soil, and loose landscape material from the surface and joints. Pay close attention to low areas where runoff may carry debris and leave it behind. Permeable pavement maintenance can target particulates caught in the upper inch of the paver joints, so clear buildup there before it obstructs water flow.
- Check drainage after rainfall. Observe how water moves through the pavers and whether it remains on the surface or in the joints. If a section drains slowly, inspect nearby openings for compacted dirt or misplaced aggregate. Clear the obstruction without pushing debris deeper into the base, where it can be harder to remove.
- Keep joint aggregate in place. Examine joints for gaps, washout, or loose material, especially after heavy Florida rain. Top up openings with suitable aggregate when needed, keeping the surface even and the drainage paths open. Avoid using joint material that can lock the openings or migrate away during runoff.
- Use polymeric joint sand where appropriate. This material hardens when activated with water and helps resist erosion from heavy Florida rains. It also helps prevent paver shifting, weed growth, and ant infestation. Apply it carefully according to the installation method, keeping excess sand off the paver surface and preserving the system’s water-entry openings.
- Address shifting or damaged pavers promptly. A loose paver can create an uneven surface and expose gaps in the surrounding joints. Concrete pavers are easier to repair than poured concrete, allowing an affected unit to be reset or replaced without rebuilding the entire area. Check adjacent pavers too, since movement may extend beyond the first visible spot.
- Protect the system’s long-term performance. With proper maintenance, permeable interlocking concrete pavers typically last 20-30 years. Keep drainage openings clear, replace displaced joint material, and address recurring standing water rather than covering it. These steps help preserve both the paver pattern and the function of the base beneath it.
- Review the whole setting, not only the pavers. Leaves from nearby planting beds, soil tracked from a garden, and runoff from adjoining surfaces can all contribute to clogging. After clearing the pavers, check the surrounding landscape for sources of debris and adjust routine cleanup to suit the site.
Filter fabric and permeable aggregate base
The stone reservoir beneath the pavers holds and moves rainwater through open aggregate. For a Parrish project, excavation depth, fabric placement, and aggregate size should suit the planned surface and site conditions.
Excavate for the Aggregate Reservoir
Excavate to suit the planned surface and base depth, keeping the reservoir consistent across the footprint. Permeable driveway excavation typically ranges from 12-24 inches deep, while patios and walkways use shallower bases. Check exposed soil for areas that could hold stagnant water, and remove soft or unsuitable material before laying fabric.
Estimate aggregate needs from the finished base depth: a 6-inch base requires approximately 3 tons of stone per 100 square feet, an 8-inch base about 4 tons, and a 12-inch base about 6 tons. These estimates help plan material delivery and excavation capacity. Extend the excavation beneath the planned edge restraint so outer pavers have support.
Install Filter Fabric and Open-Graded Aggregate
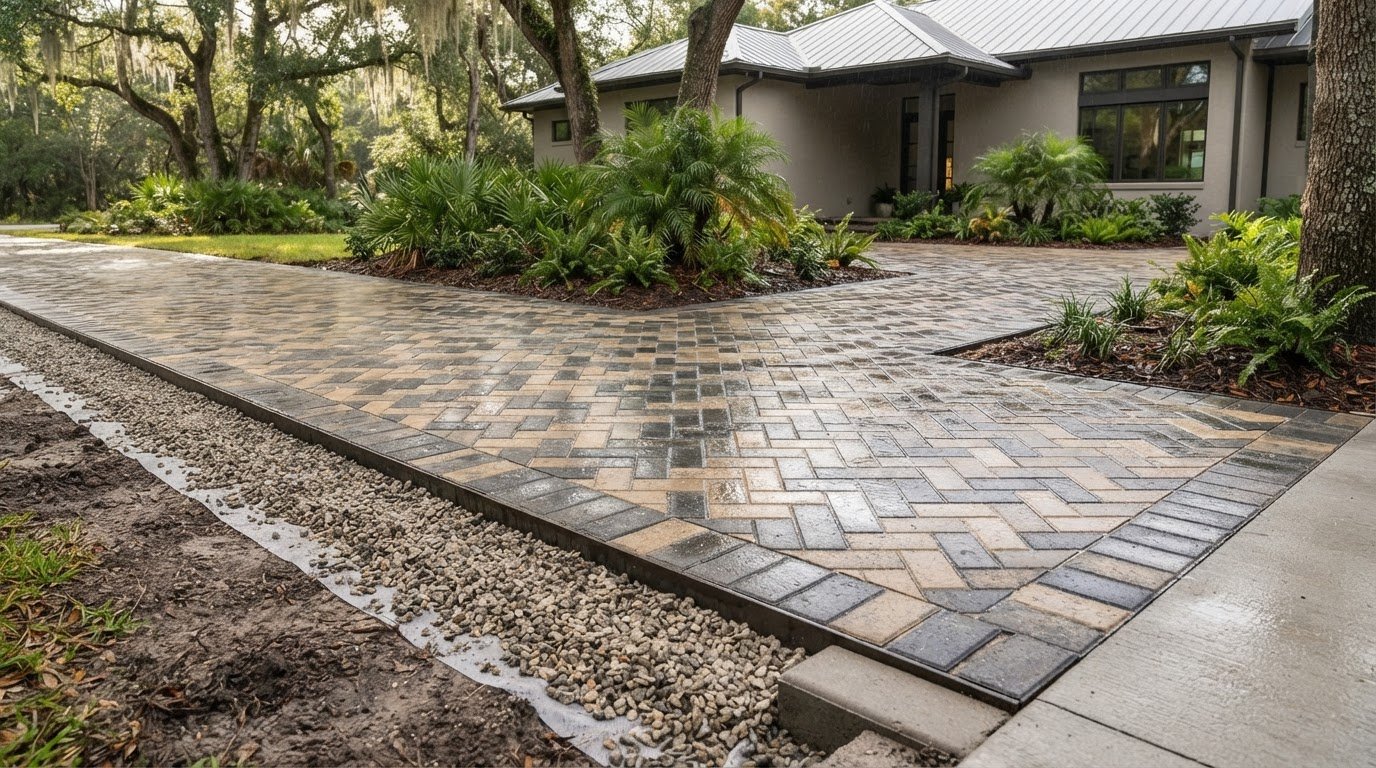
Lay woven geotextile over prepared soil, then place open-graded stone without dragging equipment across exposed fabric. Overlap fabric seams by at least 6 inches to limit soil migration into the aggregate. The preferred base material is 1 1/2-inch open-graded crushed stone; use 3/4-inch open-graded stone if the larger grade is unavailable.
Build the reservoir in compacted layers so the stone remains stable while preserving connected voids for water. Place and compact graded stone in lifts no thicker than 3 inches. Avoid fine material that can fill those voids and slow infiltration.
- Place the base aggregate. Spread open-graded stone evenly over the fabric. Keep the specified base depth consistent, and compact each lift before adding another.
- Shape the bedding layer. Use the project’s specified bedding aggregate to create an even surface beneath the pavers. A 1-inch bedding layer is one installation example; the appropriate depth depends on the selected system and project design.
- Secure the perimeter. Install an edge restraint because permeable paving needs a firm border to hold its pattern. Extend the base to support the restraint instead of leaving the outer pavers unsupported.
- Protect open drainage paths. Keep soil, loose fines, and bedding material from spilling into the reservoir’s open stone. Before laying pavers, inspect for displaced fabric, uneven areas, and blocked aggregate voids.
- Finish the edge and bedding together. Check that the restraint aligns with the paver layout and that the bedding surface remains even. Correct dips before placement, since uneven support can affect the finished surface and drainage through the base.
Paver installation in Parrish, Florida
In Parrish, a permeable-paver installation pairs a precise layout with layers that let rain pass through. Use this sequence to plan a driveway, patio, or walkway for a stable finish. For permeable paver installation in Parrish, consider the footprint and drainage together before excavation begins.
- Mark the layout and protect the work area. Set out the paver footprint with stakes and string, then extend the marked boundary 6 inches beyond its perimeter for the edge restraint. Use the 3-4-5 method to check square corners before excavation. Call 811 before digging so underground utilities can be located and avoided.
- Plan the pattern around the site. Choose a paver pattern that suits the hardscape and keeps cuts along less prominent edges. For example, align a walkway pattern with its approach to the home, then carry that direction through connected paving. Concrete grid pavers can also combine stone, grass, or decorative gravel for a distinct surface.
- Excavate for the planned assembly. Remove soil to accommodate the base, bedding, and paver thickness, while preserving the marked edge allowance. Shape the excavation to meet the intended drainage plan instead of creating a level basin. Take particular care near sensitive shallow aquifers and environmentally sensitive areas, where infiltration needs thoughtful consideration.
- Set the edge restraint before laying the field. Permeable paving needs a secure border to keep its flexible surface in place. Install the restraint around the prepared perimeter, and dig a trench 8 to 12 inches deep for curbstone edging. Keep the edge aligned with the intended pattern; a wandering border can shift the course lines and weaken the finished appearance.
- Place pavers with consistent joints. Work outward from a straight reference edge, checking alignment as each row is laid. Permeable paver installations create openings between one-quarter and one-half inch wide, which allow water to filter into the stone layers below. Fill the joints to ⅛ inch below the paver edges, keeping aggregate level and openings clear.
- Compact and inspect the finished surface. Follow the selected system’s installation sequence when setting the pavers, then refill joints where aggregate settles. If no plate compactor will be used, reduce the setting-bed thickness to 1 inch and excavation depth by 1 inch. Walk the finished area and check for uneven pavers, open joints, or edges that need adjustment. These checks matter for permeable pavers in Parrish, where a complete finish depends on both alignment and open drainage paths.
- Coordinate the hardscape with its surroundings. Review how the driveway or walkway meets planting beds, existing paving, and the route rainwater takes across the property. Permeable pavers can help reduce runoff, but their joints and underlying stone must remain open to receive water. For a coordinated paver layout and durable hardscape installation, plan your project with the full outdoor setting in mind.
Landscape By Design Of Palmetto: Landscape Design
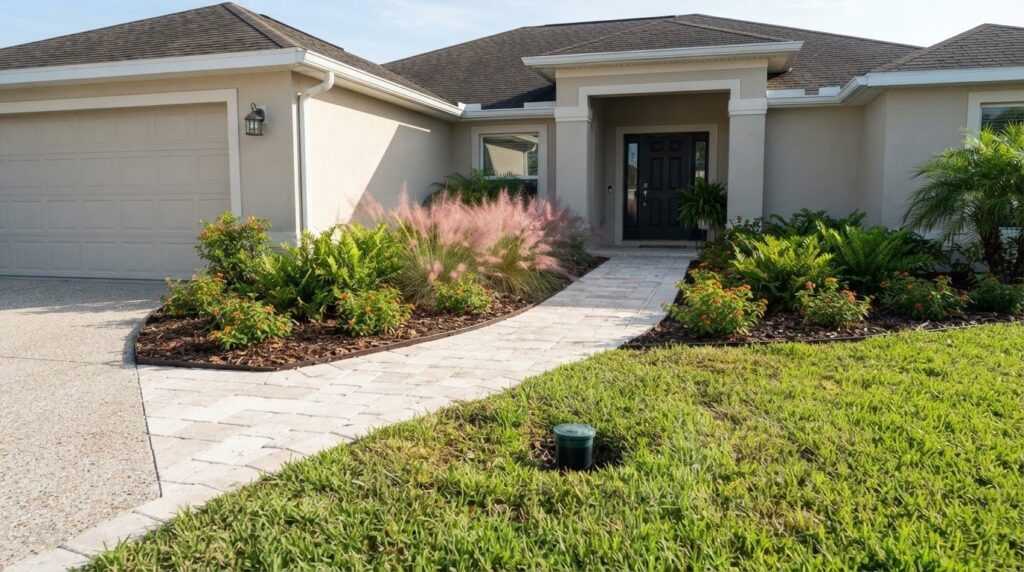
Landscape By Design Of Palmetto can plan permeable pavers as part of a cohesive outdoor design. The team can help when a driveway, patio, or walkway needs to connect naturally with planting areas, retaining walls, or the wider landscape. Landscape Design and Hardscapes and Retaining Walls bring the layout and structure together, while Irrigation and Sprinkler Systems and Landscape Lighting can be considered alongside the finished hardscape. A coordinated plan helps each element feel intentional, from surface transitions to the setting around the pavers. Contact Landscape By Design Of Palmetto to discuss your landscape design and hardscape project.
Shape a Surface That Belongs in Your Landscape
Start by picturing how the finished space should work in daily life. A driveway, garden path, or outdoor gathering area each calls for a layout suited to its use and the character of the home. Thoughtful permeable pavers installation in Parrish can form part of a broader plan rather than an isolated surface.
Landscape By Design Of Palmetto brings Landscape Design together with Hardscapes and Retaining Walls to connect paver areas with their surroundings. Irrigation and Sprinkler Systems can also be considered as the landscape plan takes shape. Begin with clear priorities: how you’ll use the space, how it should relate to the home, and what will make it feel cohesive.
When you’re ready to shape those ideas into a considered outdoor plan, contact Landscape By Design Of Palmetto. A well-planned surface can make the whole landscape feel more complete.
Frequently Asked Questions
What are permeable pavers and how do they work?
Permeable pavers create a paved surface with joints that let rainwater pass into the stone layers below. The aggregate reservoir temporarily holds water, allowing it to filter toward the ground instead of immediately running across the surface. For example, a patio and its connecting path can share a continuous permeable area if the layout and underlying soil support water movement.
How much does permeable paver installation cost per square foot in Parrish, FL?
There isn’t one fixed per-square-foot price for a Parrish installation. The project price depends on the area, existing surface, excavation, base requirements, drainage plan, and selected materials, and is provided after a quote request. A driveway replacing old pavement has a different scope from a new walkway on prepared ground, so the surface area alone won’t explain the full project cost.
What factors affect permeable paver installation costs?
Project scope reflects more than paver selection. Consider how much existing material must be removed, whether equipment can access the site, and how the edges meet steps, garden beds, or other paving. A simple rectangular patio may need fewer cuts than a curved path with several transitions. Drainage needs and the amount of base preparation also shape the work involved.
What site conditions and drainage considerations matter for permeable pavers in Parrish?
Soil’s ability to receive water, existing slopes, and nearby structures all influence placement. Observe where rainwater currently collects and whether roof runoff reaches the proposed area. In Parrish, Palmetto, Bradenton, and Sarasota, site conditions can vary, so assess each planned driveway or patio individually. Avoid directing water toward a building or neighboring property.
What is the step-by-step process for installing permeable pavers?
Start by marking the layout and locating underground utilities, then excavate and prepare the soil. Install filter fabric and the aggregate reservoir, shape the bedding, and secure the perimeter restraint. Lay pavers in the chosen pattern, fill the joints with suitable aggregate, and complete final compaction. Before regular use, inspect the surface for loose units, unfinished edges, or joints that need topping up.
How do permeable pavers compare with concrete and standard pavers for driveways?
Permeable pavers admit rain through their joints into the stone base, while a continuous concrete surface directs more water across its top. Standard pavers may have tight joints that don’t provide the same drainage path. For a driveway, compare water movement, appearance, and repair needs: individual concrete pavers can be replaced, while damage to a poured slab may require a different repair approach.